 Acer File Extensions |
Hewlett Packard DeskJet 420C
If you need the user manual or software for your printer you can download it from the Printer Support section of the Hewlett Packard website.
Noise Levels
The printer makes a knocking sound when it is powered on, or a churning sound when it begins to print.
The knocking sound (that the printer makes when it is turned on) is caused by the ink cartridge finding its starting position. This is normal. The churning sound (that the printer makes when it begins to print) is caused by the activation of the printing mechanism. This is normal. The printer is also liable to make a loud clicking noise when the paper is picked up, again this is normal.
Wrong Cartridge Error During Comms Test
Blinking Cartridge Light with Wrong Cartridge Selected during Communication Test.
When the communication test fails version 8.5 printer driver software, a message appears, asking which ink cartridge is being used. If you choose the black cartridge while actually using a colour cartridge and then attempt to print in black, the cartridge light will blink. However, unlike the version 8.0 driver, there will be no error message reminding you to change the print cartridge. This may be confusing if you have upgraded your printer software from version 8.0 to version 8.5.
Loading Envelopes/Labels/Thick Paper
Envelopes, labels, and thick paper must be fed into the printer manually, one by one and print side up, from the back of the printer.
- Select Manual Feed
- From the software program click File and click Page Setup.
- Select the Paper Source tab.
- Select Manual Feed in the First Page and Other Pages lists and click OK.
- Open the paper tray.
- Open the printer door and switch the envelope lever to Envelope. Then close the printer door.
- Align the envelope, label, or thick paper against the respective molded lines on the manual feed slot.
- Insert the envelope, label, or thick paper until the printer pulls it in.
- From the File menu, click Print to print your document.
Loading Legal/Executive/B5-Sized Paper
Legal, Executive, and B5-sized paper must be fed into the printer manually, sheet-by-sheet, from the back of the printer.
NOTE: When you load letterhead or transparencies from the back of the printer, insert them print side up, with the top of the page going into the printer first.
- Select Manual Feed.
- From the software program click File and click Page Setup.
- Select the Paper Source tab.
- Select Manual Feed in the First Page and Other Pages lists and click OK.
- Open the paper tray.
- Align the paper against the molded line on the manual feed slot (on the back of the printer) and insert the paper until the printer pulls the paper in.
- From the File menu, click Print to print your document.
How to Clear a Print Jam
- Turn off the printer.
- Remove the paper from the paper tray.
- Open the printer door.
NOTE: Open the printer door approximately 30 degrees from the front cover (60 degrees from the paper tray).
- Remove the printer door by grasping it by its sides and then pulling the door toward you.
NOTE: Remove the door by grasping it by its sides, then pulling the door upwards.
WARNING: If the door is opened all the way, the hinges will bind on the front cover and will be damaged if an attempt is made to pull the door forward. By angling the door about 30 degrees from the closed position, the door may then be pulled upward (not forward) to remove it. This may take some force the first time the door is removed.
- Open the paper separator (the flap that separates the printed pages from the blank sheets) by pulling it toward you. This gives you a better grip on the jammed paper.
- Grip the jammed paper firmly by its sides and pull it out slowly.
- After clearing the paper jam, close the paper separator.
- Re-attach the printer door by first placing the door flat on the paper tray. Then align the hinges on the printer door with the pins on the printer. Press the printer door in until the printer door clicks into place.
- Close the printer door.
- Load paper and try printing again.
Printing Envelopes from MS Word v6.0/7.0
To print envelopes, use the following procedure:
- Select Tools from the menu bar and choose Envelopes and Labels.
- Choose the Envelopes tab and type in the address information. Choose Options.
- On the Envelope Options tab, select Envelope Size 10 and choose OK.
- Select the Feed icon in the lower right corner of the Envelopes tab.
- In the Feed Method section, select Face Up, remove the "X" from Clockwise Rotation, and select the envelope icon on the far right.
- In the Feed From section, select Manual Feed and choose OK.
- Open the printer door and switch the envelope lever to envelope. Then close the printer door. Rotate the envelope 180 degrees from the picture (insert method) shown on the back of the printer, align the envelope against the envelope guides on the back of the printer, and insert the envelope until the printer pulls it in.
- Choose Print.
Slow Printing
There are several solutions to slow printing, depending on the cause.
Cause 1: Your computer might be running out of memory.
- Close all other programs.
- Restart your computer. Then, open only the program you need to print from.
- Free up as much space as possible on the computer's hard drive.
- If this happens on a regular basis, you may need to purchase more memory for your computer.
Cause 2: Best mode is selected under Print Quality in the Printer Setup dialog box.
- Select Normal mode or EconoFast mode. Best mode prints more slowly than normal mode.
Cause 3: HP Transparency or HP Glossy Paper is selected as the Paper Type.
This can cause printing to be slow because the printer adjusts its print speed to allow more time for the ink to dry.
Changing Ink Cartridges
The HP DeskJet 420C printer takes any one of the following Inkjet print cartridges at a time:
- 51625A - Tri-Colour (supplied with printer)
- 51626A - Large Black (optional)
- 51626G - Black (optional)
To replace the cartridges,
- Open the printer door.
- Press the Change Cartridge button on the front of the printer to move the print cartridge cradle (holder) to the middle position.
- Remove the Inkjet print cartridge by pulling its green top.
- Remove the new Inkjet print cartridge from its box.
- Gently remove the tape(s) covering the ink nozzles. Be careful not to touch the ink nozzles or the copper contacts.
- Insert the Inkjet print cartridge into the holder at an angle such that the green top is tilted toward you. The arrow on the top of the Inkjet print cartridge should be pointing toward the inside of the printer.
- Push the green top in until the Inkjet print cartridge snaps into place.
- Close the printer door.
- Press the Change Cartridge button.
Printing a Test Page
There are 3 ways to print a test page,
Option 1: Use the Change Cartridge button
Hold the Change Cartridge button for five seconds when the printer is turned on and idle.
Option 2: Use the Paper Feed button
Press the Paper Feed button, turn the printer on, and release the Paper Feed button.
Option 3: Use the HP Printer Setup Dialog Box
- Click on Start / Settings / Printers
- Highlight the Deskjet 420c and from the File Menu click on Properties.
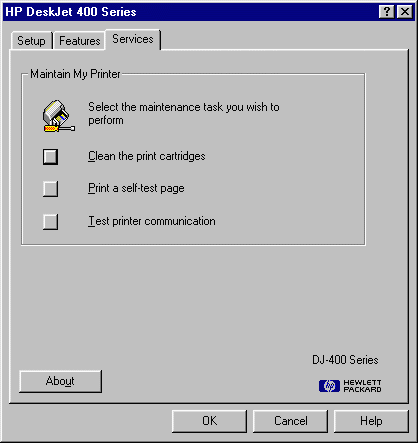
- From the Services tab, select Print a self-test page.
What it should look like,
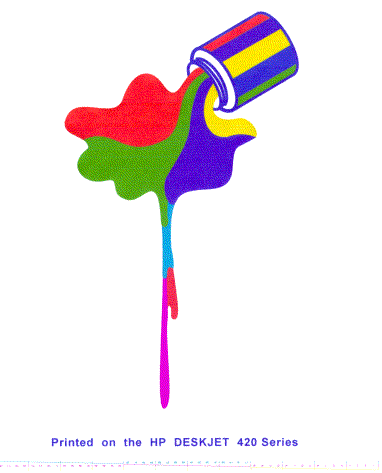
The Colour Self Test should look like this,
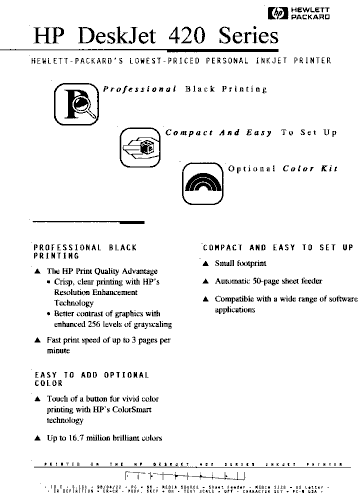
The Black Self-Test shhould look like this,
Printing in Black Instead of Colour
Pages are printing in black ink instead of colour ink.
- Check the print cartridge. Make sure you have a colour print cartridge installed in the printer before printing.
- Check the settings in the Printer Setup dialog box. Make sure that Colour is selected under Installed Cartridge in the Printer Setup dialog box.
- Also make sure that the Print in Grayscale option is not selected on the Features tab when you want to print in colour.
Changing Printer Properties
- Click Start, Settings, and Printers.
- Highlight the HP DeskJet 420C.
- Click File and click Properties.
- Click the Setup, Features, or Services tab, and make any desired changes. (Some printer drivers may require clicking the Details tab and then the Setup button to change the printer settings.
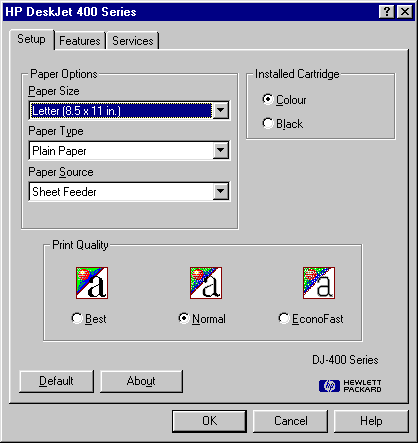
Setup Screen
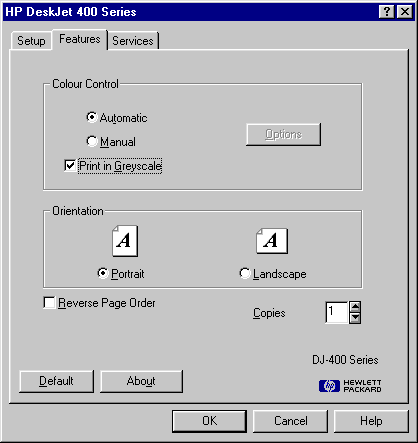
Features Screen
Services Screen
Colour Print Quality Problems
Bands of light and dark colour appear on printed pages
Sometimes the printer can print information faster than the computer can send it. When the printer is waiting for information, the print cartridge pauses, and a banding effect may occur. Select Best mode under Print Quality in the Printer Setup dialog box. Then, try again to print your document.
Black areas appear green
When you use a colour print cartridge to print black, the resulting "composite black" may have a green tint. Try the following,
- Select Automatic under Colour Control in the Printer Setup dialog box. OR
- Select Best under Print Quality in the Printer Setup dialog box.
Colours appear to be washed out
Try the following two options:
- Check settings in the Printer Setup dialog box. Select Automatic under Colour Control. OR
- If you use the Manual setting, click the Options button; then, move the Intensity slider to the left to increase the amount of ink used.
Check the print cartridge. The print cartridge might be empty or clogged. Clean the print cartridge or replace it.
The printed colours do not match the colours on the screen
You may need to change the Colour Control setting. Select the Automatic colour setting in the Printer Setup dialog box. Automatic printing selects the printer settings to provide the best colour printing results. Some programs adjust their colour information before sending to the printer. This is because colours on the screen generally appear lighter than when printed. Since Automatic printing already accounts for this, try to disable any such colour adjustment in the program.
-Or-
If you want to use the Manual colour setting, select a different Colour Control setting. Click the Options button. Select Match under Colour Control. In Match Screen mode, printed results may not be what you anticipate. For example, what may be a greenish-yellow colour on your screen may print out as yellow with specks of green. Review your printed results to determine whether using this feature is appropriate for your desired output. You can also try adjusting the Intensity slider under Intensity or selecting the Vivid Colour setting under Colour Control.
Print Quality Problems
Characters or lines are incomplete or missing
Check that the print cartridge is installed correctly by removing the print cartridge and reinstalling it. Push the top forward to make sure the print cartridge snaps into place. If the print cartridge is clogged, clean the print cartridge or replace it.
Ink smears on the page
There are several ways to solve the problem of smeared ink, depending on the cause.
- There is simply too much ink on the page
- Select the Automatic Colour Setting in the Printer Setup dialog box.
- -Or- If you are using the Manual Colour Setting, change the Intensity of the colour. Select Manual in the Printer Setup dialog box and click the Options button. Move the Intensity slider to the right to decrease the amount of ink used. You can also try adjusting the Intensity slider under Intensity or selecting the Vivid Colour setting under Colour Control.
- The paper selection does not match paper loaded in the printer
- Make sure that the Paper Type selected in the Printer Setup dialog box matches the paper type loaded in the printer. The printer uses different methods of applying ink to the page for each paper type. This provides the best print quality for each paper type.
- HP Premium transparency films or glossy paper do not have enough time to dry
- Ink on transparencies and glossy paper takes longer to dry in high humidity conditions. Select the HP Glossy Paper (with Pause Control) or HP Transparency (with Pause Control) option in the Printer Setup dialog box.
All of the print is on the page, but the ink appears faint
Check settings in the Printer Setup dialog box. Try changing the Print Quality setting. If the Print Quality is set to EconoFast mode, which is a draft-quality setting, change it to Normal. Select Automatic under Colour Control. -Or- If you use the Manual setting, click the Options button, then move the Intensity slider to the left to increase the amount of ink used.
Check the print cartridge. If the tape covering the new ink cartridge was not removed, remove the tape. The print cartridge might be empty or clogged. Clean the print cartridge or replace it.
All of the print is on the page, but the ink appears fuzzy
There are several ways to solve the problem of fuzzy print, depending on the cause.
- If you use the Manual setting under Colour Control, the Intensity slider in the Options dialog box might be set too high.
- Select Automatic under Colour Control.
- -Or- If you still want to use the Manual setting, click the Options button. Then move the Intensity slider to the right to decrease the amount of ink used.
- The paper type might be affecting print quality.
- Change the type of paper you use. See the documentation that came with your printer for information on selecting paper types.
- You might be trying to print on the wrong side of the paper.
- Turn the paper over in the sheet feeder or paper tray.
- If you are trying to print on an envelope, the envelope lever might be set incorrectly.
- To print on envelopes and thicker paper, open the printer door and move the envelope lever (on the right side of the printer) to the Envelope position. After you have finished printing, move the envelope lever back to the paper position. For optimal print quality, always adjust the envelope lever according to the type of paper you are printing on.
"Folder Was Moved or Removed" Error
"Folder Was Moved or Removed" error during printer install
When the driver for a variety of HP DeskJet printer models is installed after a fresh Windows 98 install, a system dialog box appears with the following message:
"C:\WINDOWS\Start Menu\Programs\_____HP_G_ is not accessible. This folder was moved or removed."The solution is to click OK on the error message, and continue with the install. Reboot the computer and try a print job. Everything should function normally.
Front Panel Lights and Buttons
There are three buttons and lights are located on the front of your HP DeskJet printer: Change Cartridge , Paper Feed , and Power . The buttons control printing and the lights provide information about the printer status.
How the lights blink (or do not blink) tells you how your HP DeskJet printer is operating. The following three issues are discussed:
The Change Cartridge Light is blinking.
- You may be printing a black document with a colour Inkjet print cartridge, or vice-versa. Change the Inkjet print cartridge accordingly.
- No Inkjet print cartridge has been loaded. Load an Inkjet print cartridge.
- The Inkjet print cartridge is improperly installed in the printer. Remove the Inkjet print cartridge, and then reload it.
- A wrong Inkjet print cartridge has been loaded.
The Paper Feed Light is blinking
- No paper has been loaded or the printer is out of paper.
- Paper is not loading.
- Reload the paper.
- You are printing on U.S. Letter size paper, but the paper size selector (A4/LTR) is set to A4 or vice versa.
- Too many sheets of paper were loaded. Remove some paper.
- Paper is damaged, wrinkled, or curled. Replace paper with a new stack.
- Some paper in the stack may be of a different type, size, and weight. Make sure the paper in the stack are of the same type, size, and weight.
- Paper does not eject from the printer.
- Paper is jammed in the printer.
- The printer door is not closed properly.
- The computer was turned off while the printer was printing. Turn off the printer and turn on the computer. Then turn the printer on.
- More than one sheet of paper is fed into the printer at a time.
- The sheets of paper are stuck together. Remove the paper stack, separate the sheets, and re-load the paper stack.
- Printing is slanted on the A4-sized paper
- You are printing on A4-sized paper, but the paper-size selector (A4/LTR) is set to LTR (US Letter). Switch the paper-size selector (A4/LTR) to A4.
- Paper is not fed into the printer properly. Reload the paper.
- The Legal-sized paper, envelope, label, or thick paper is not fed into the printer properly. Push evenly the Legal-sized paper, the envelope, or the thick paper into the back of the printer until the printer pulls on the paper.
After loading paper, press the Paper Feed button to continue printing.
The Deskjet 420c can take the following types of paper,
- Plain Paper - Auto feed: 16 to 24 lb (60 to 90 g/m2)
- Plain Paper - Manual feed: 16 to 36 lb (60 to 135 g/m2)
- Envelopes - 20 to 24 lb (75 to 90 g/m2)
- Cards - 110 lb Index max. (110 to 200 g/m2, 8.5 pt max. thickness)
NOTE: If you are loading letterheads or transparencies, insert them print side down, with the top of the page going into the printer first.
All three lights are blinking
Paper is jammed in the printer. To clear the jam, see the section on Paper Jams. If there is no paper jam, turn the printer off, and then on again. If the three lights still blink, call HP customer support at the number listed in the User's Guide that came with your printer.